The Gravity Forms Dynamics CRM Add-On provides great support for connecting WordPress to Dynamics CRM and Dynamics 365 and allows you to create relationships between Dynamics entities with ease.
Related entities in Microsoft Dynamics 365 define a relationships between one or more entities such as Contact and Account, Lead and Source Campaign or Lead and Marketing List.
In this post we will walk through the process of adding a related entity field to a form so it can be mapped in a Gravity Forms Dynamics feed and flow from WordPress to Dynamics.
In this example, we will be mapping the Source Campaign field for the Lead entity in Dynamics. The process is the same regardless of the related entity field you wish to map.
- The first thing we need to know in order to establish a relationship between two entities is the ID of the related entity.
- We’re going to use a helpful open-source Google Chrome extension called Dynamics CRM Power Pane in order to make this process easier. You can install the Chrome extension here.
- Next, if you have not already done so, login to your Dynamics instance.
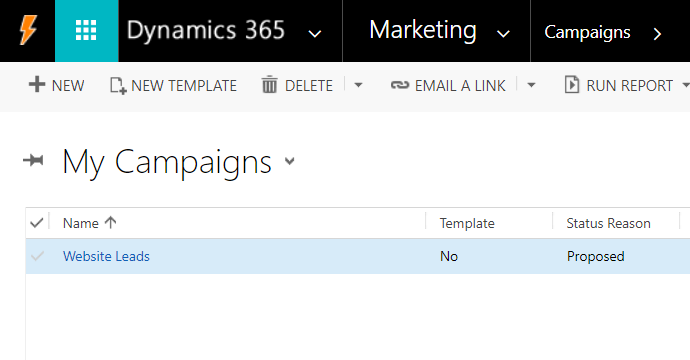
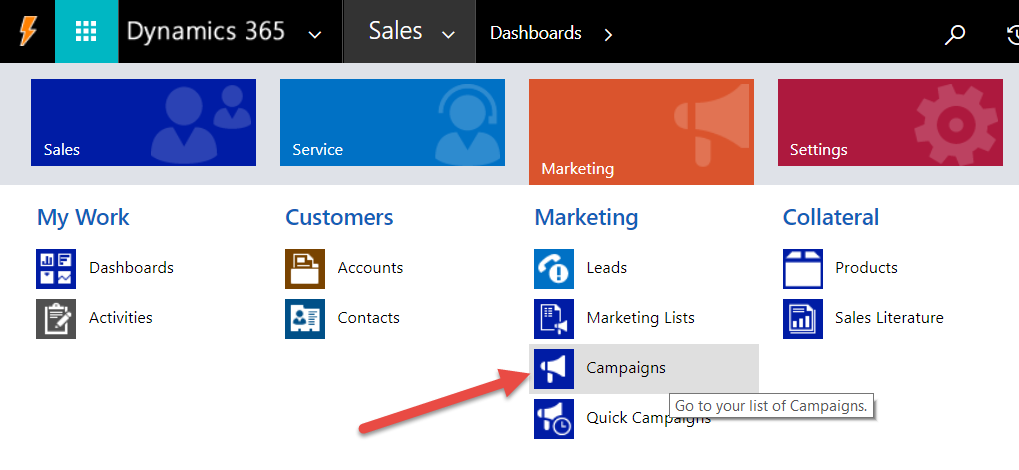
- Once logged-in, navigate to the Marketing > Campaigns list.

- Next, click on the target campaign. In our example, we want all leads coming from a specific form on our site to be mapped to the “Website Leads” marketing campaign, so we’ll click on that record.

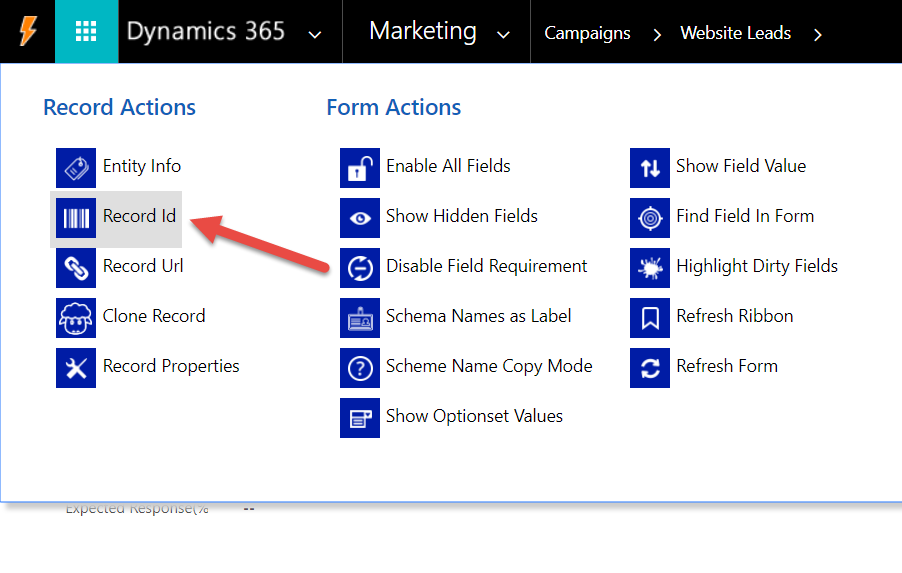
- On the campaign detail screen, this is where we are going to leverage our newly installed Chrome extension. Notice, the lightning bolt icon in the top left corner. This is added by the Power Pane extension. Click the lightning bolt to bring up the power pane menu and then click the Record Id menu item.

- This will open a Record id dialog box (show below). In the dialog box, click the “Copy it!” link shown below the record id. Finally, click the OK button to close the dialog.

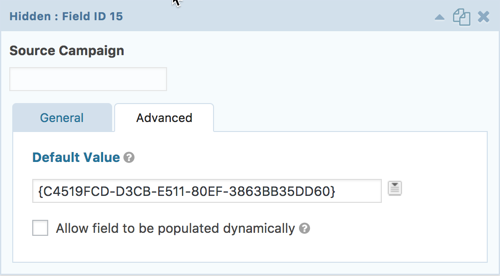
- With the record id copied, we can now go back to WordPress and place a hidden field on our form called Source Campaign.
- On the Advanced tab for our hidden field, we’ll paste the record id we copied to our clipboard in the Default Value box for our field:
- Next, we’ll click Update on our form to save the changes.
- Finally, we’ll navigate to our form’s feed mapping for Dynamics by choosing Settings > Dynamics CRM from the menu at the top of our form.
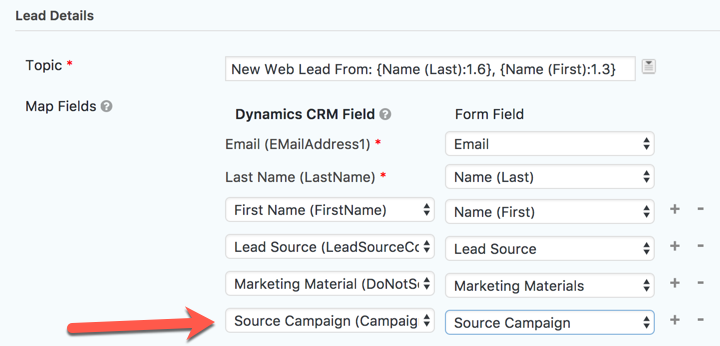
- On that screen, under the Map Fields section, we’ll add a new field to our mapping and choose “Source Campaign (CampaignId)” under the Dynamics CRM Field column and map it to our new “Source Campaign” hidden field we added to our form.

- Finally, we’ll click the Update Settings button at the bottom of that screen so save our Dynamics feed settings.
- Now, any new form entries will create a lead with a Source Campaign of “Website Leads.”