This article shows how to download the Gravity Forms Dynamics CRM Add-On and install it in WordPress. If you’ve installed a WordPress plugin from a zip file before, you already know the steps.
Download the add-on
- Sign in to My Account.
- Open the Downloads tab.
- Click the download link next to Gravity Forms Dynamics CRM Add-On and save the zip file. Don’t unzip it.
Install the add-on
-
Sign in to your WordPress dashboard.
-
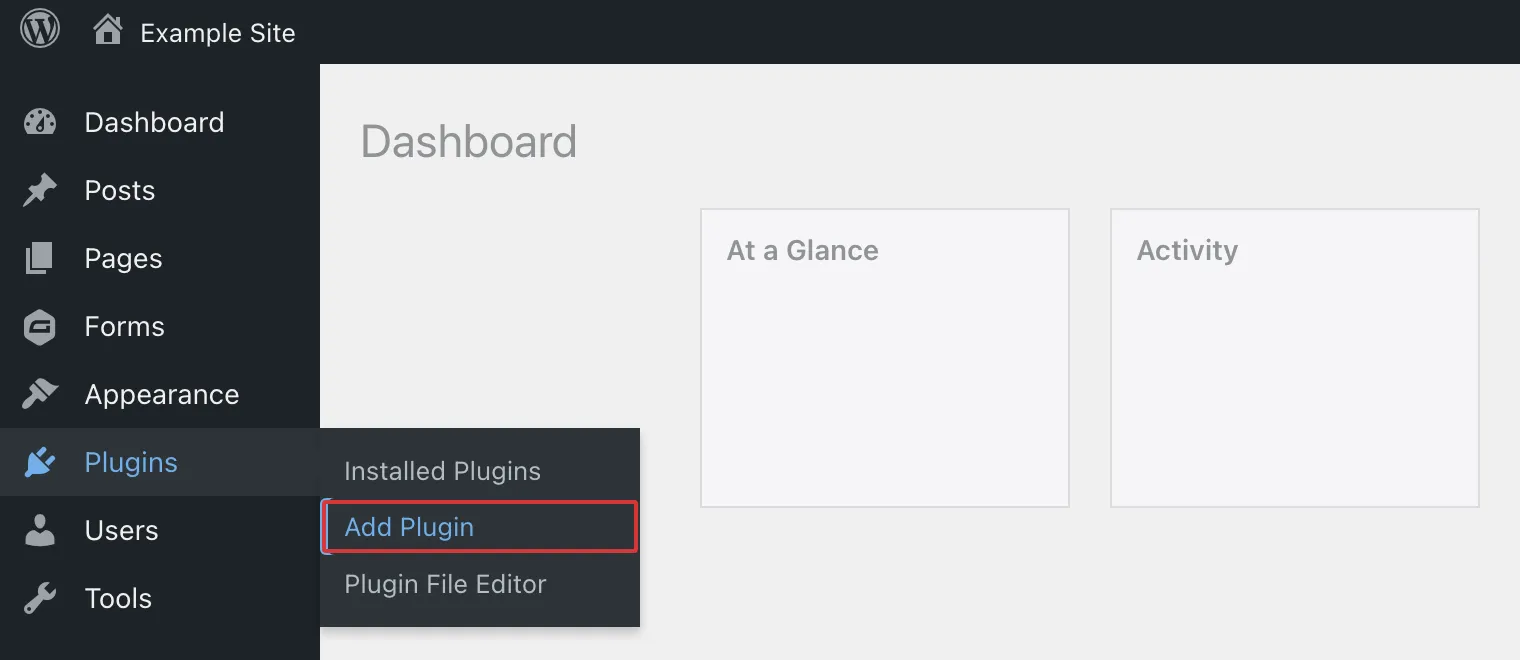
Hover over Plugins and click Add Plugin.
-
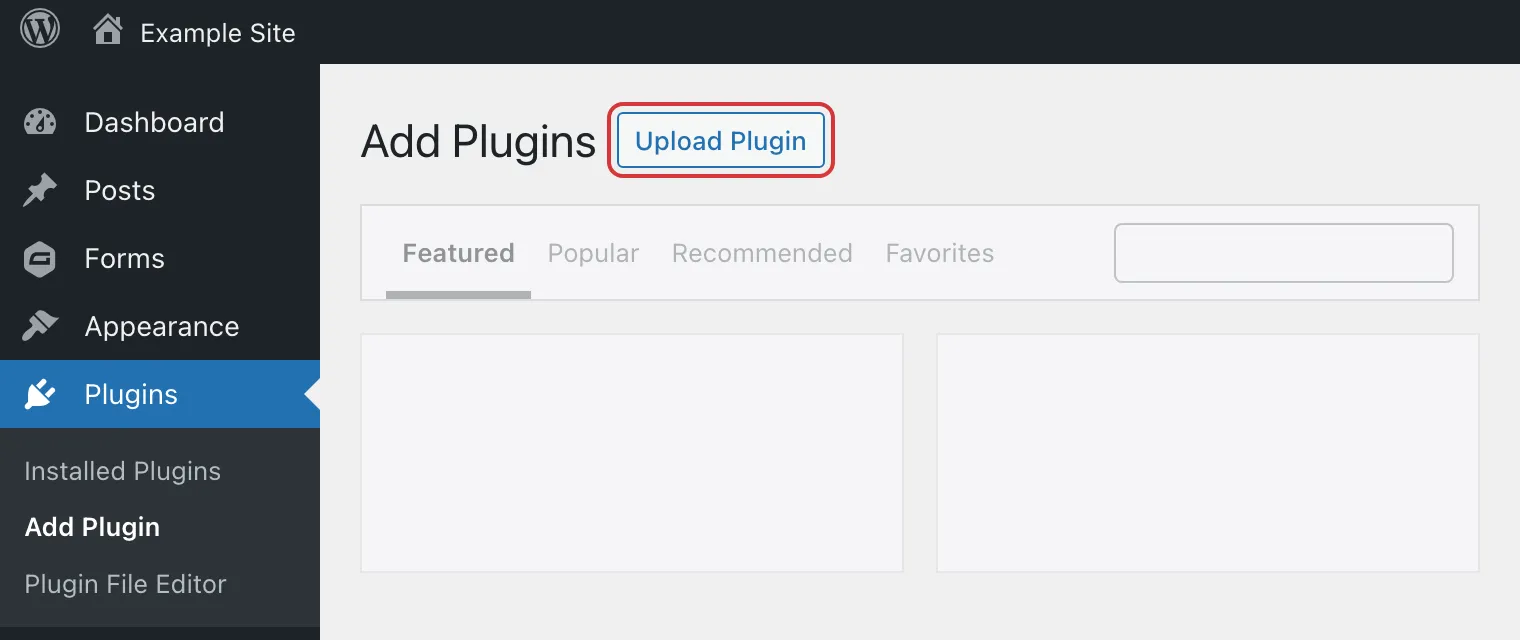
Click Upload Plugin at the top of the page.
-
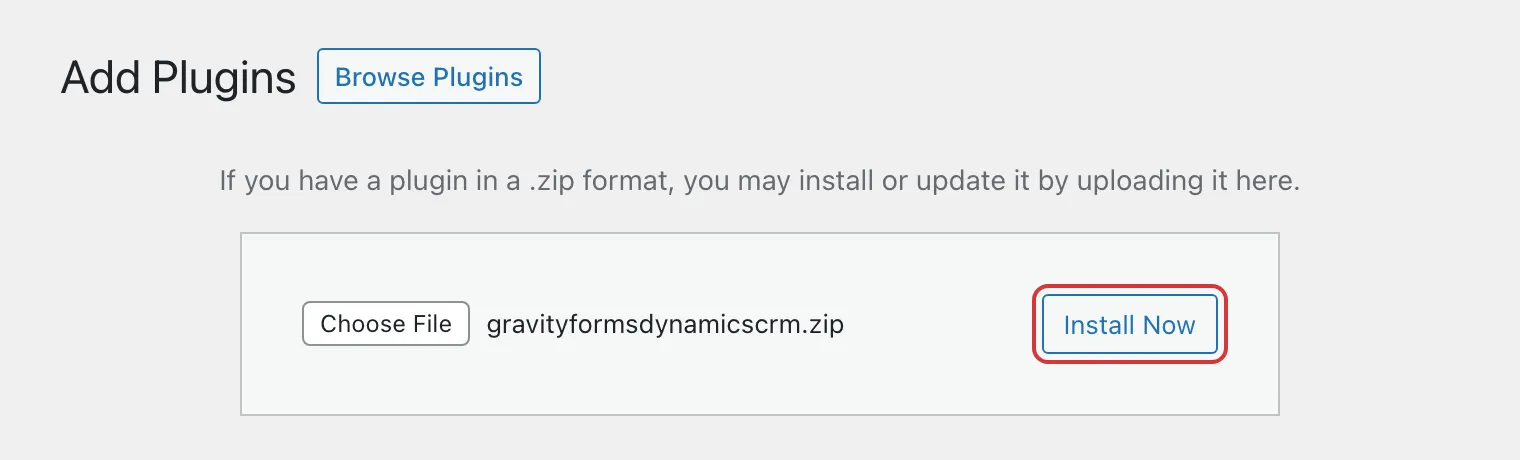
Click Choose File, select the zip file you downloaded, then click Install Now.
-
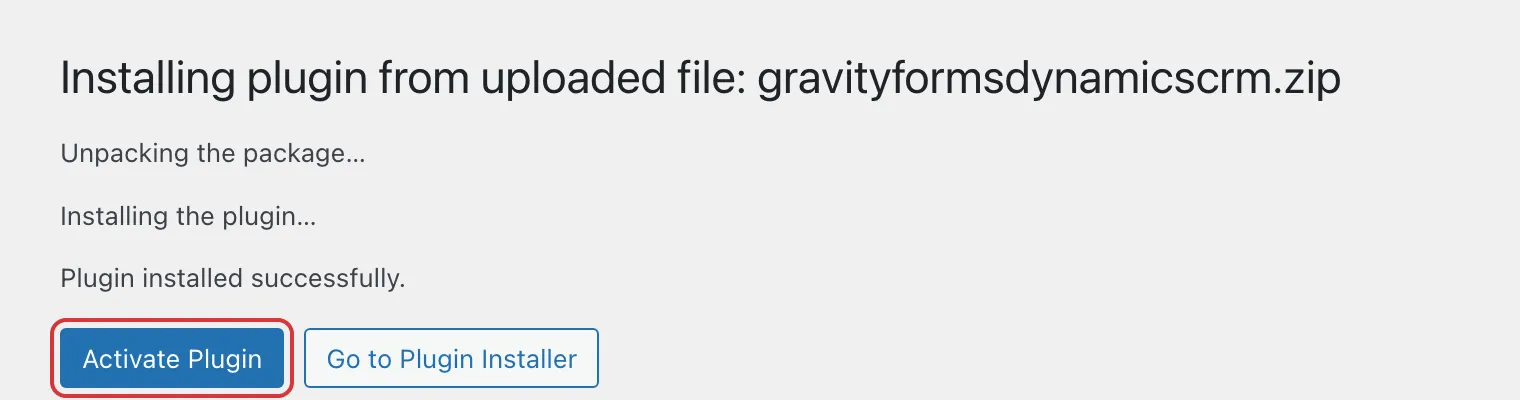
When WordPress says the plugin installed successfully, click Activate Plugin.
The add-on is now installed. Next, connect it to Dynamics in Setting Up the Gravity Forms Dynamics CRM Add-On.