By default the Gravity Forms Dynamics CRM Add-On connects with the Authorization Code grant. You sign in with a Microsoft account that has Dynamics access, and the add-on keeps refreshing that sign-in. Microsoft limits how long a sign-in can be refreshed, so eventually someone has to reconnect. Until they do, entries don’t reach Dynamics.
The Client Credentials grant avoids that. The add-on connects as an app registration with a client ID and secret instead of as a person, so there’s no password to change and no Dynamics license to assign. Setup has three parts: an app registration in Microsoft Entra ID, an application user in Dynamics, and the add-on settings.
Create an app registration in Microsoft Entra ID
-
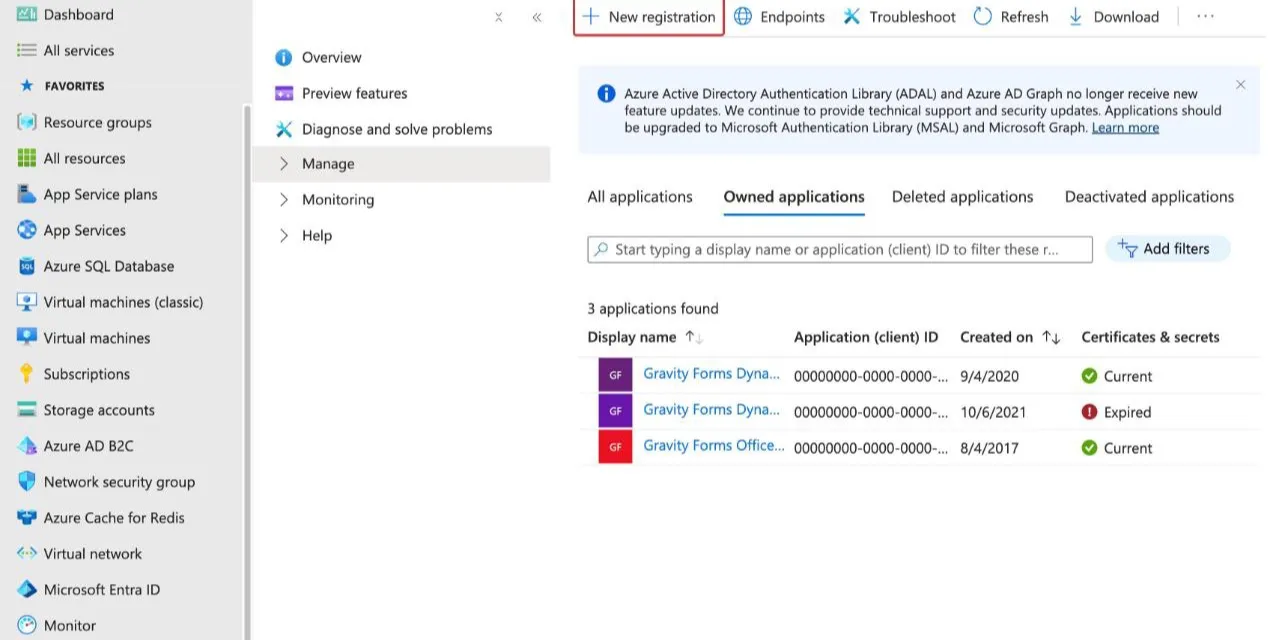
Sign in to the Azure portal, go to Microsoft Entra ID > App registrations, and click New registration.
-
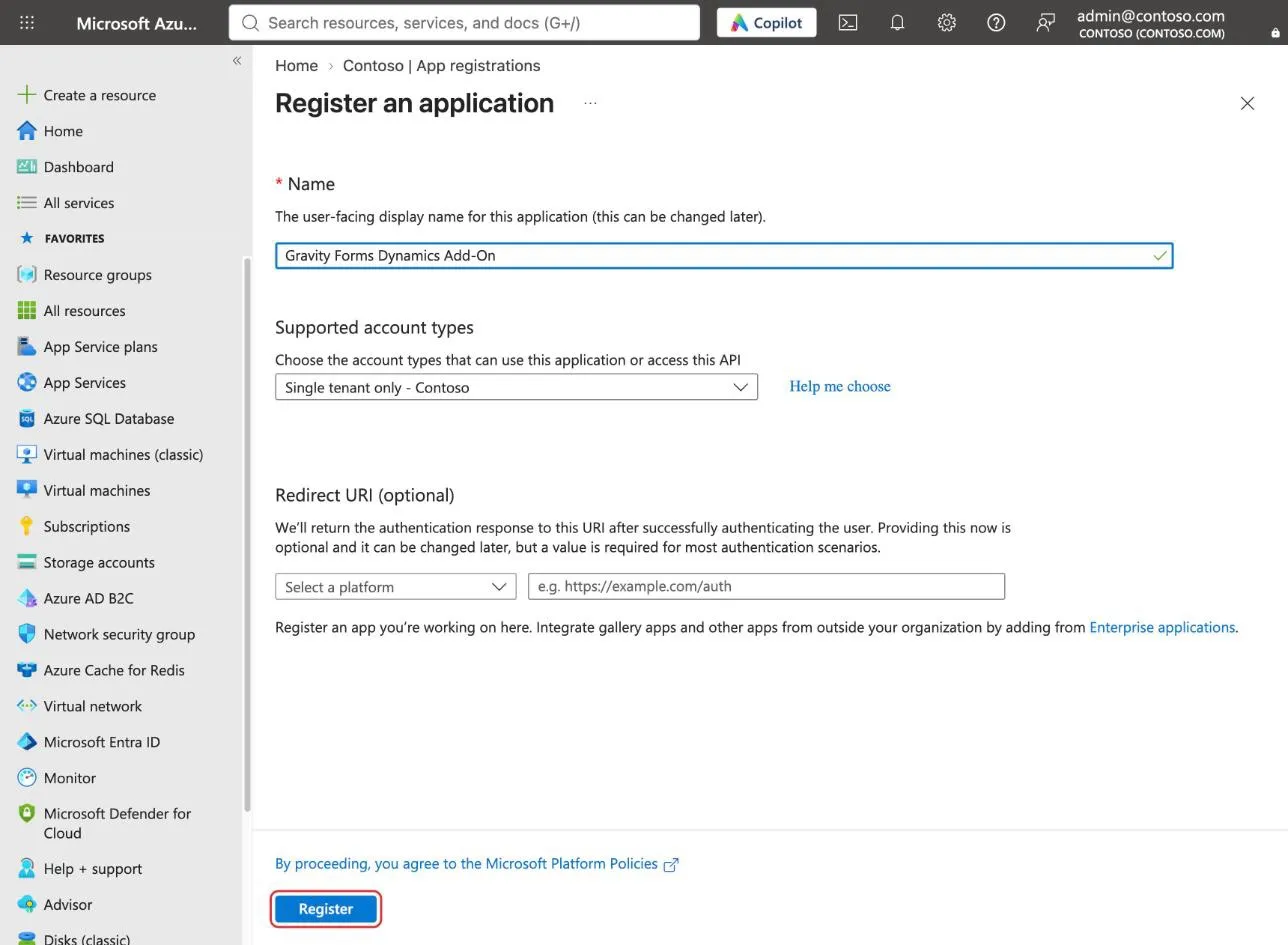
Enter a name, such as “Gravity Forms Dynamics Add-On”, keep the other defaults, and click Register.
-
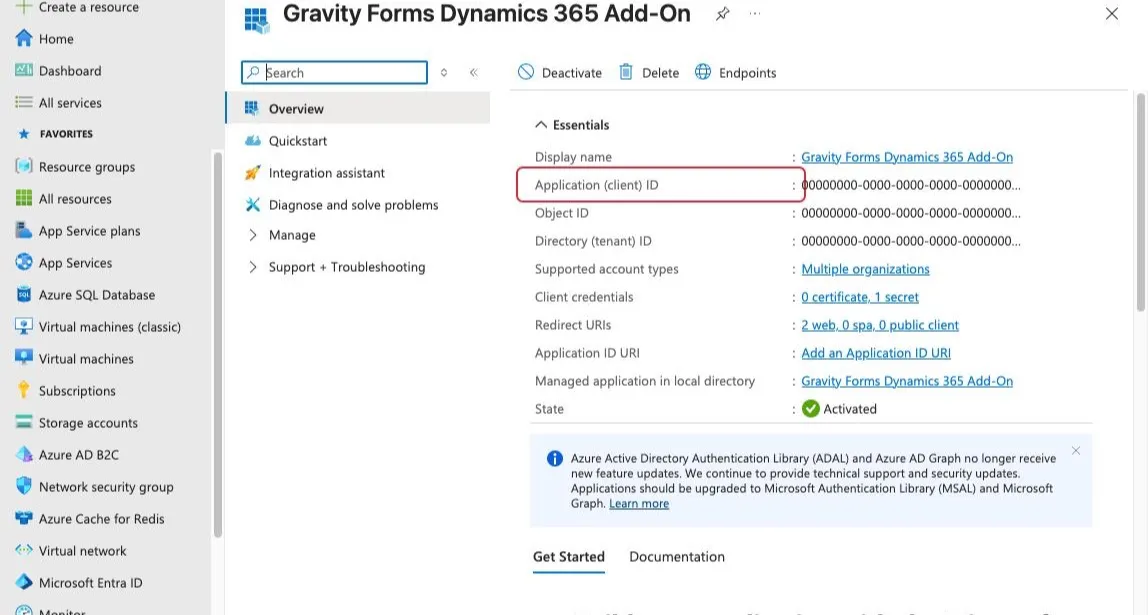
On the app’s Overview, copy the Application (client) ID and save it somewhere safe. You’ll paste it into the add-on later.
-
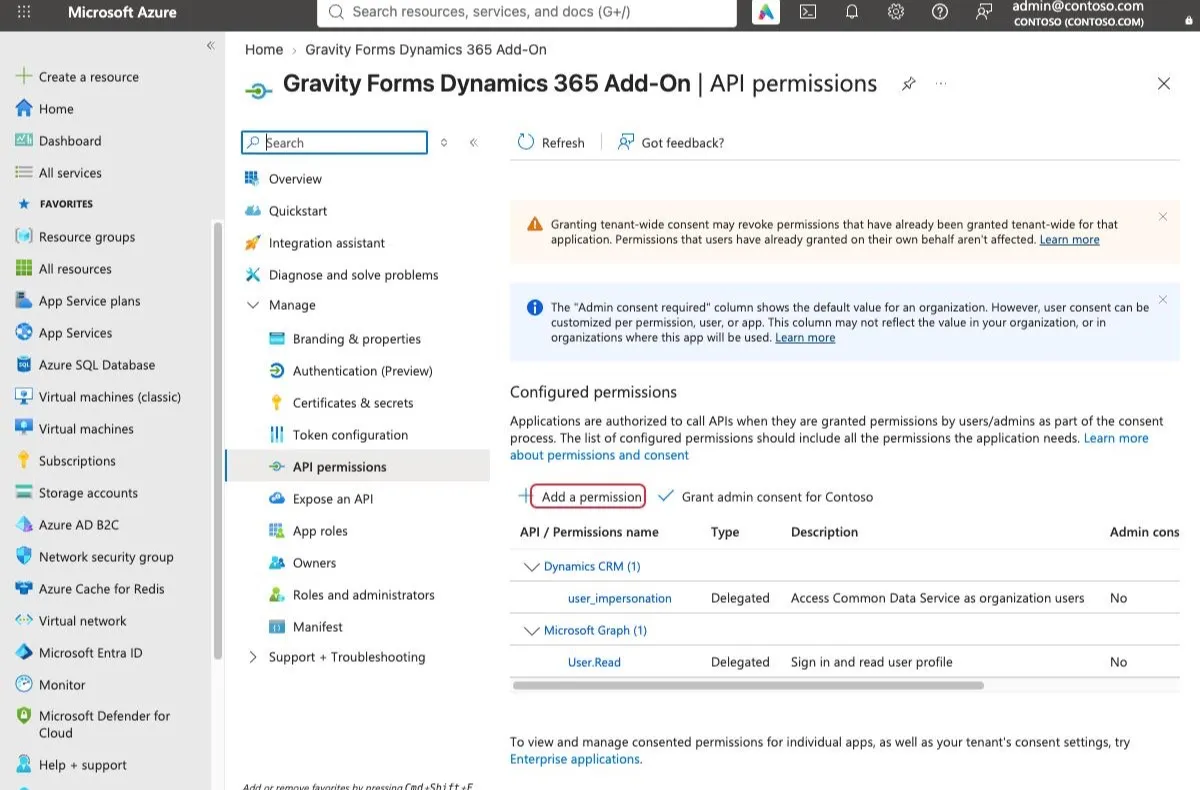
Go to Manage > API permissions and click Add a permission.
-
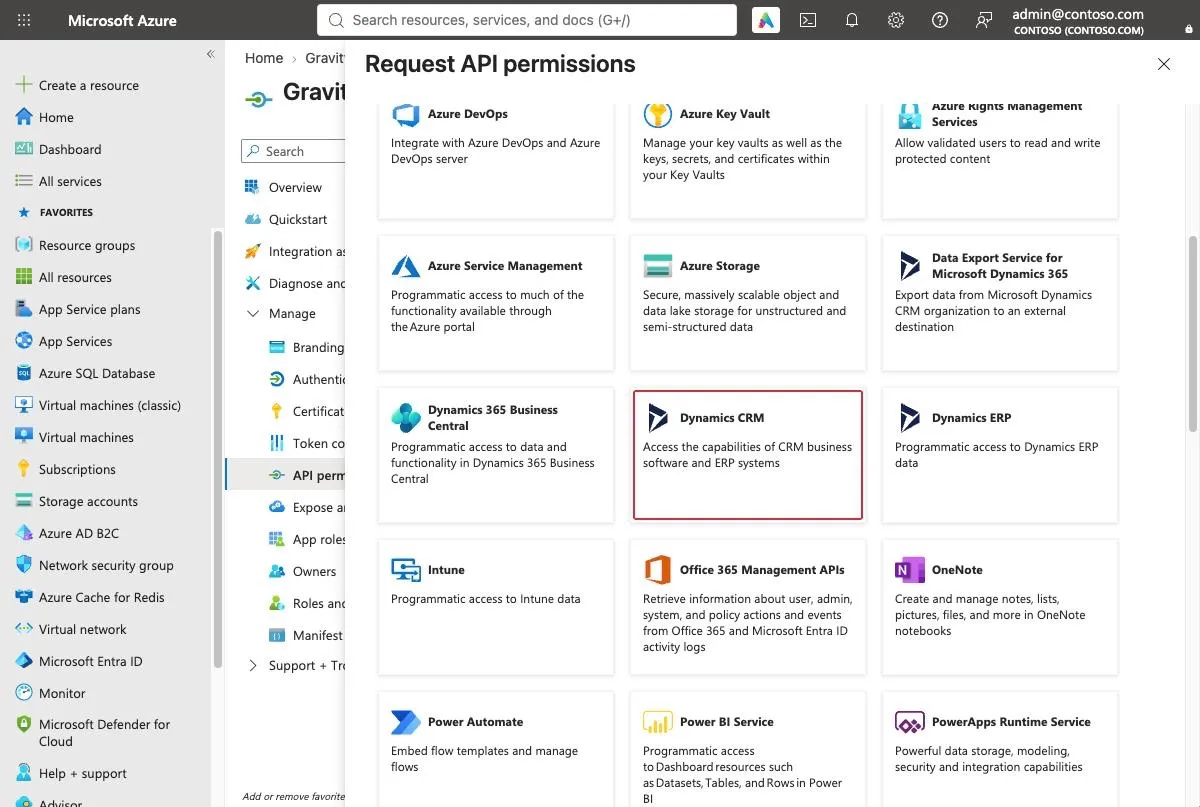
On the Microsoft APIs tab, click Dynamics CRM.
-
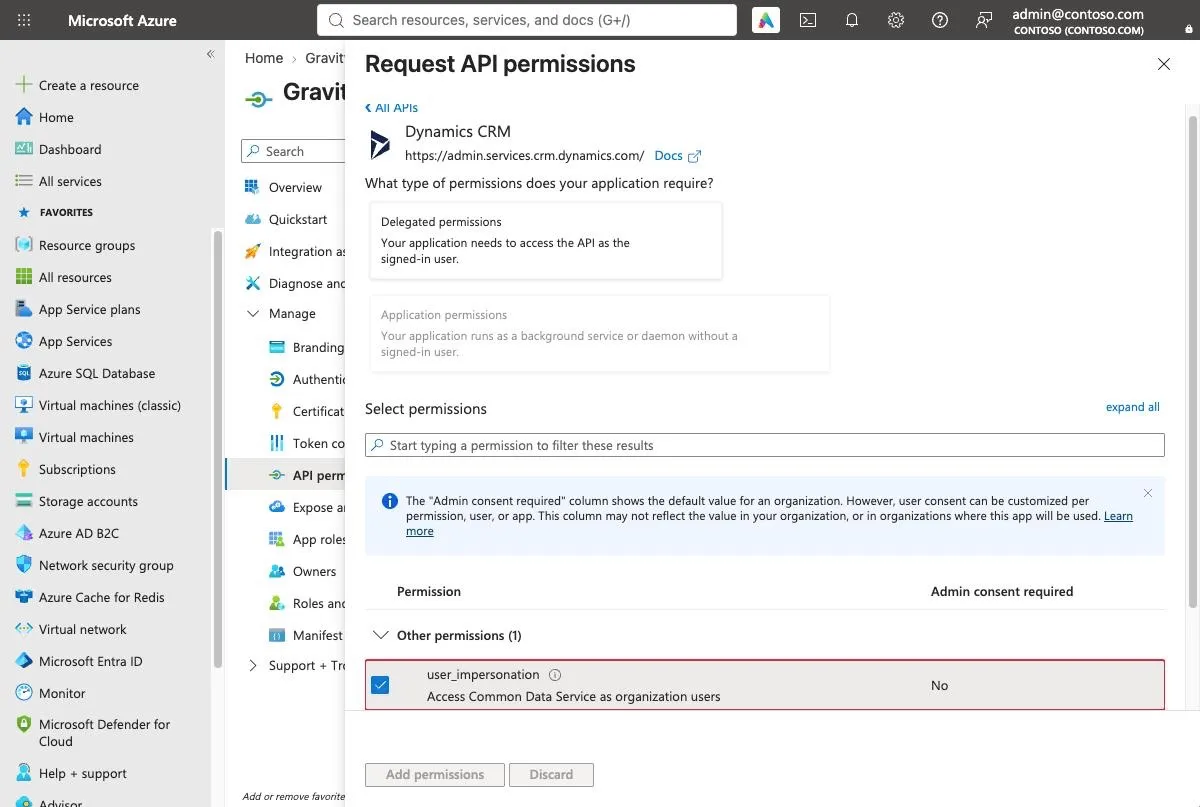
Check user_impersonation and click Add permissions. Dynamics CRM now appears in the list of configured permissions.
-
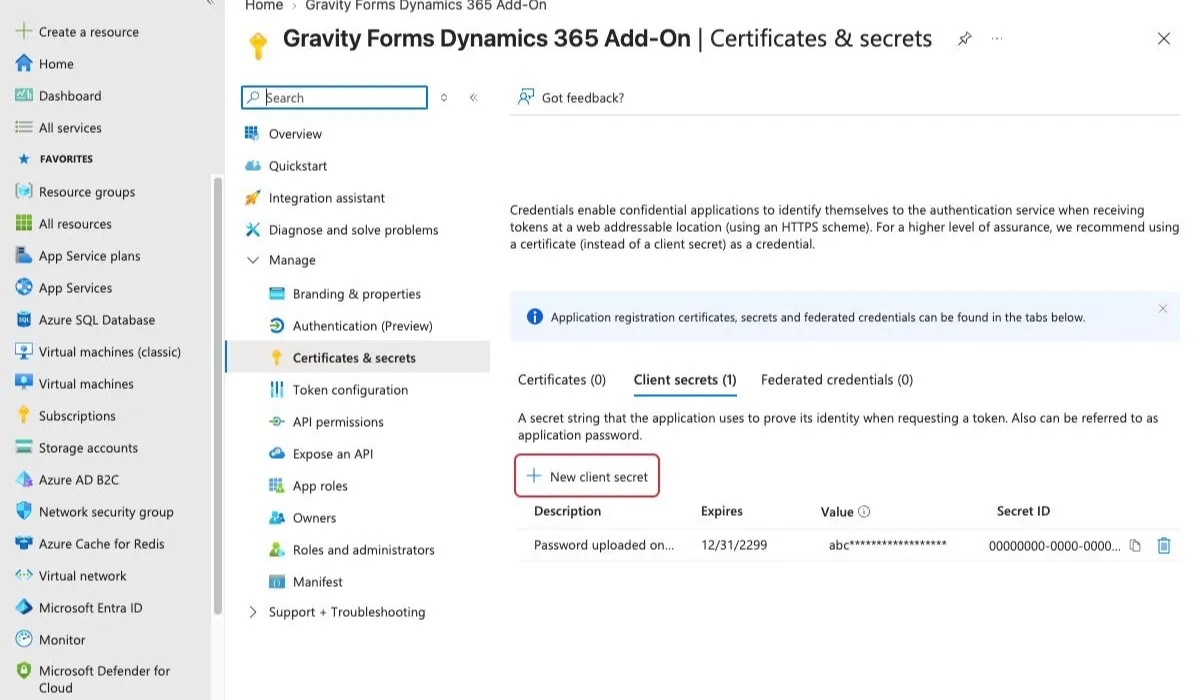
Go to Manage > Certificates & secrets and click New client secret.
-
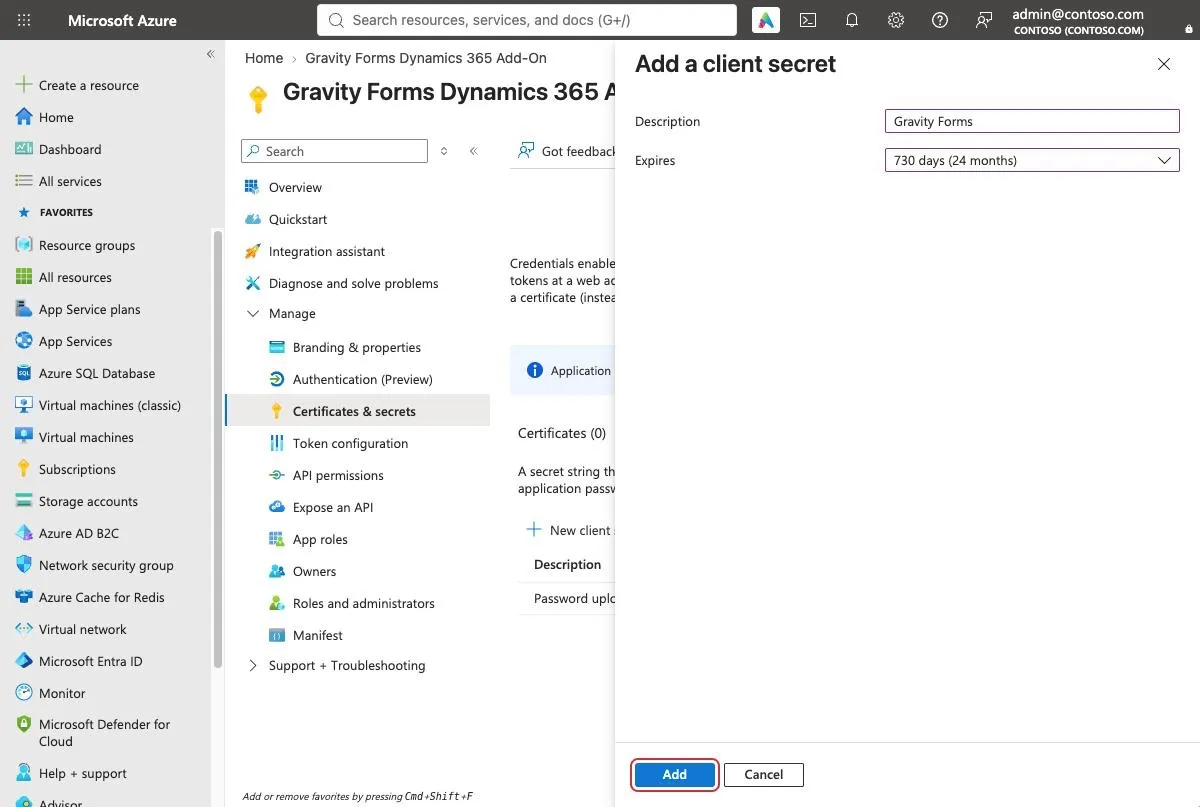
Enter a description, choose when the secret expires, and click Add. The longest preset is 730 days (24 months). Set a reminder to create a new secret before it expires.
-
Copy the secret’s Value right away and save it with the client ID. Azure only shows the value once. If you leave the page without copying it, delete the secret and create a new one.
Create an application user in Dynamics
-
Sign in to the Power Platform admin center as a System Administrator.
-
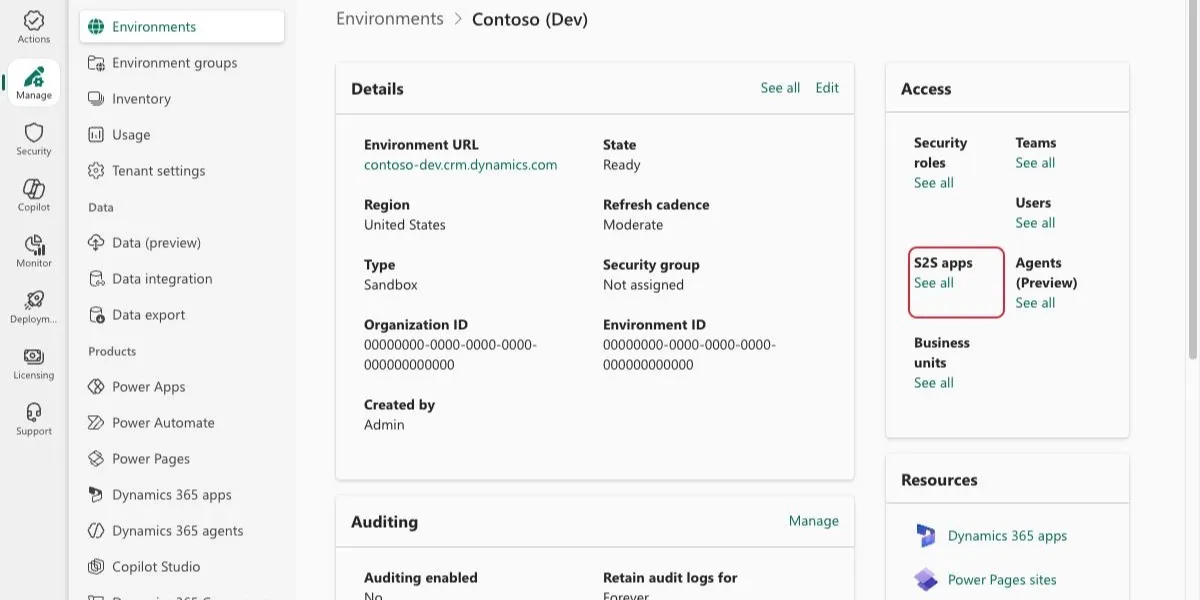
Go to Manage > Environments and open your Dynamics environment.
-
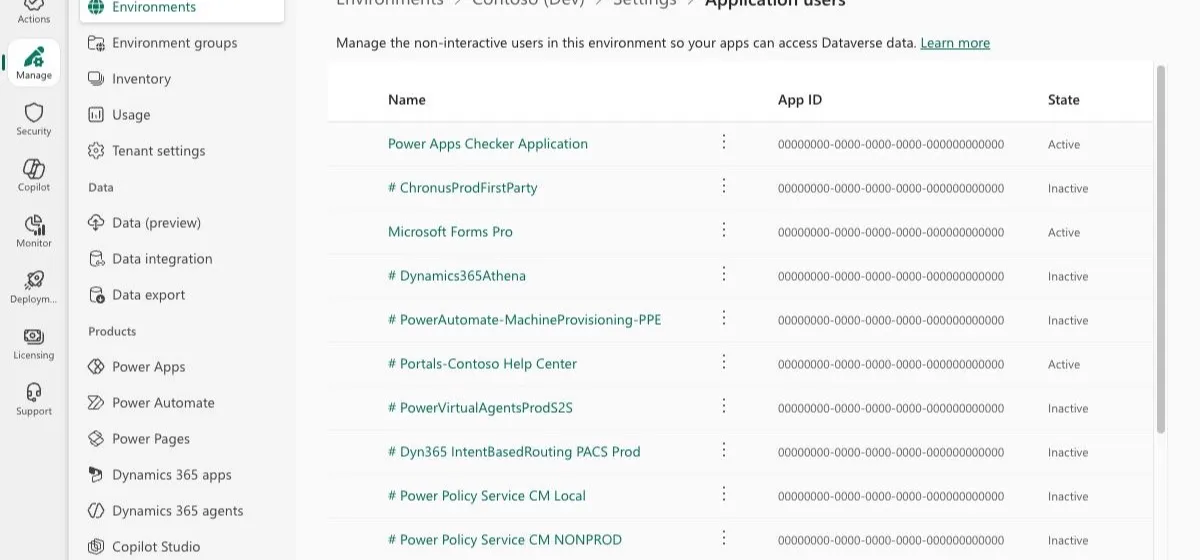
Under Access, click See all under S2S apps. This opens the Application users page.
-
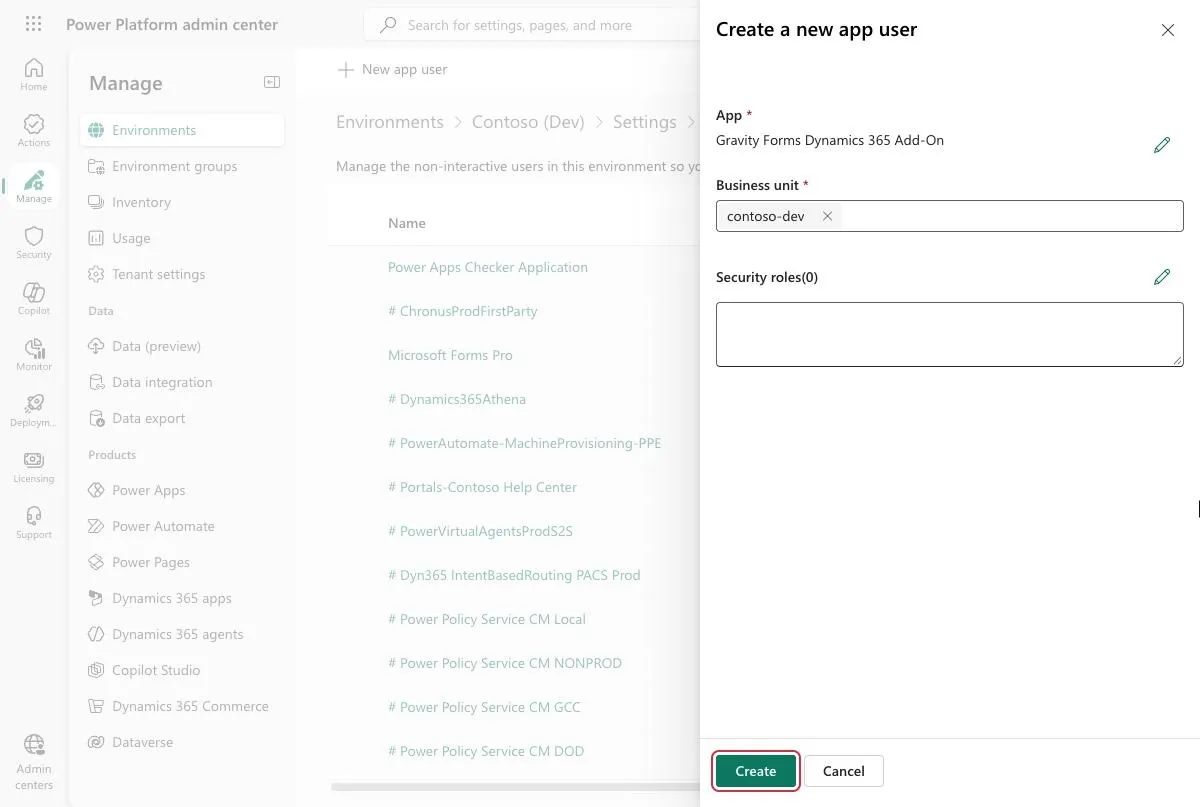
Click New app user.
-
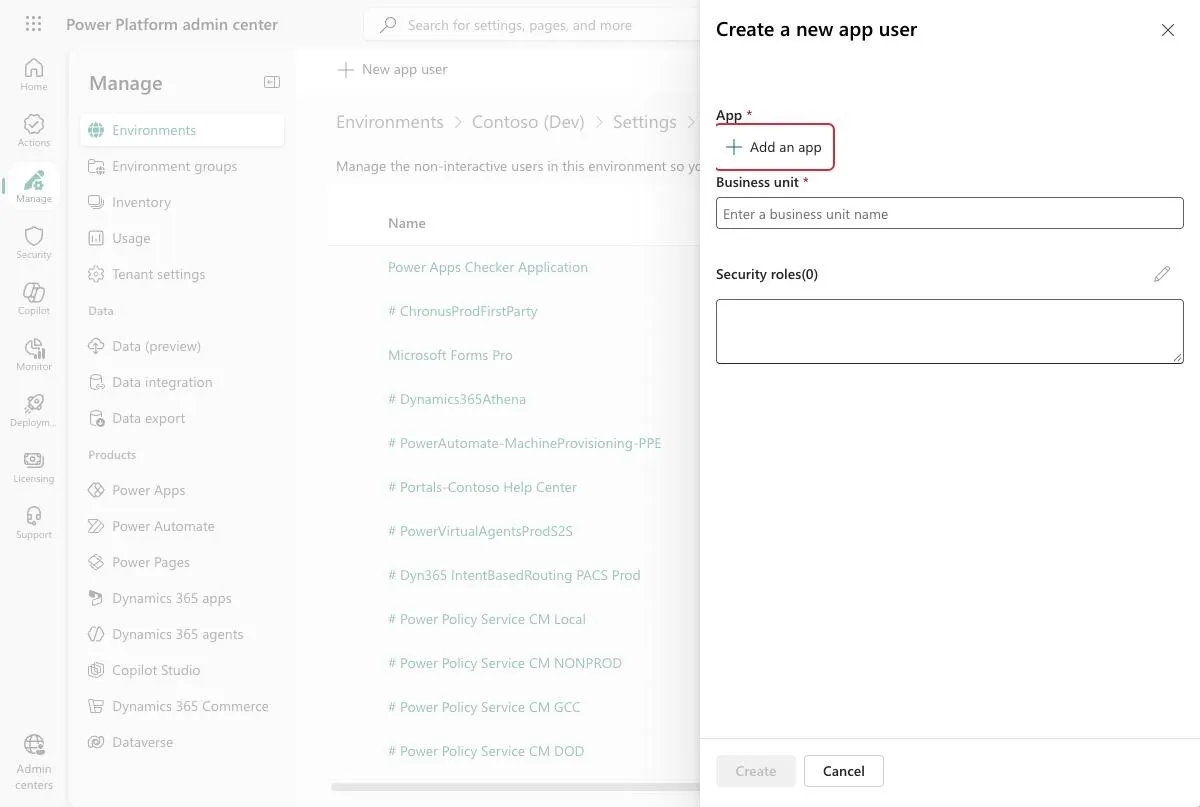
Click Add an app.
-
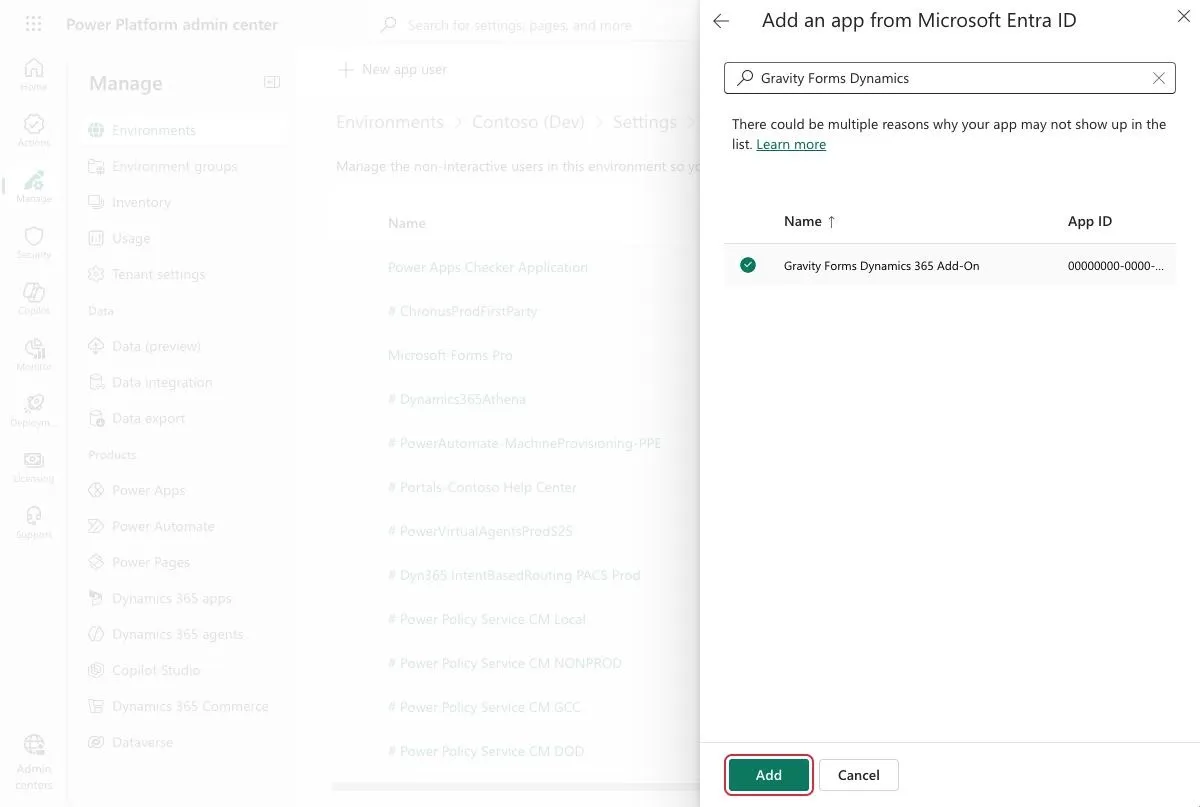
Search for the app registration you created, select it, and click Add.
-
Choose a Business unit.
-
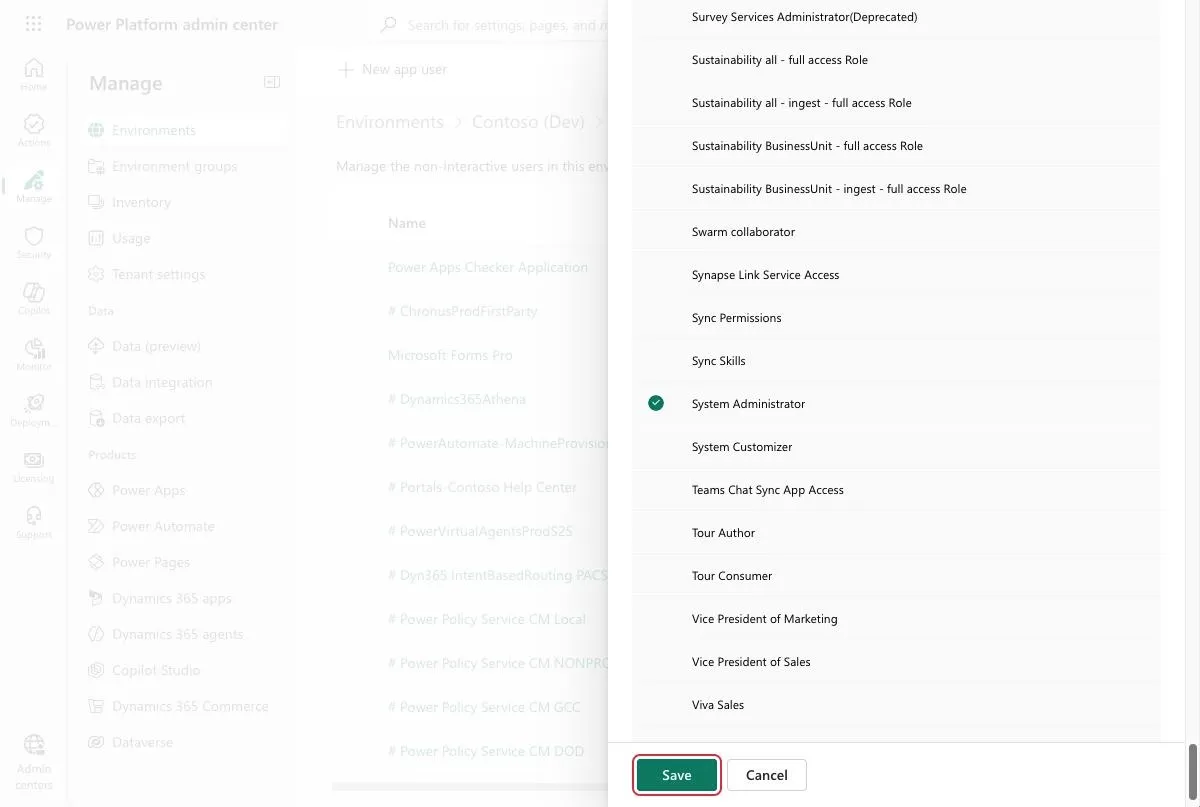
Click the pencil next to Security roles, select a role, and click Save. Pick a role that can create and update the records your feeds send, such as leads and contacts.
-
Click Create.
Set up the add-on
-
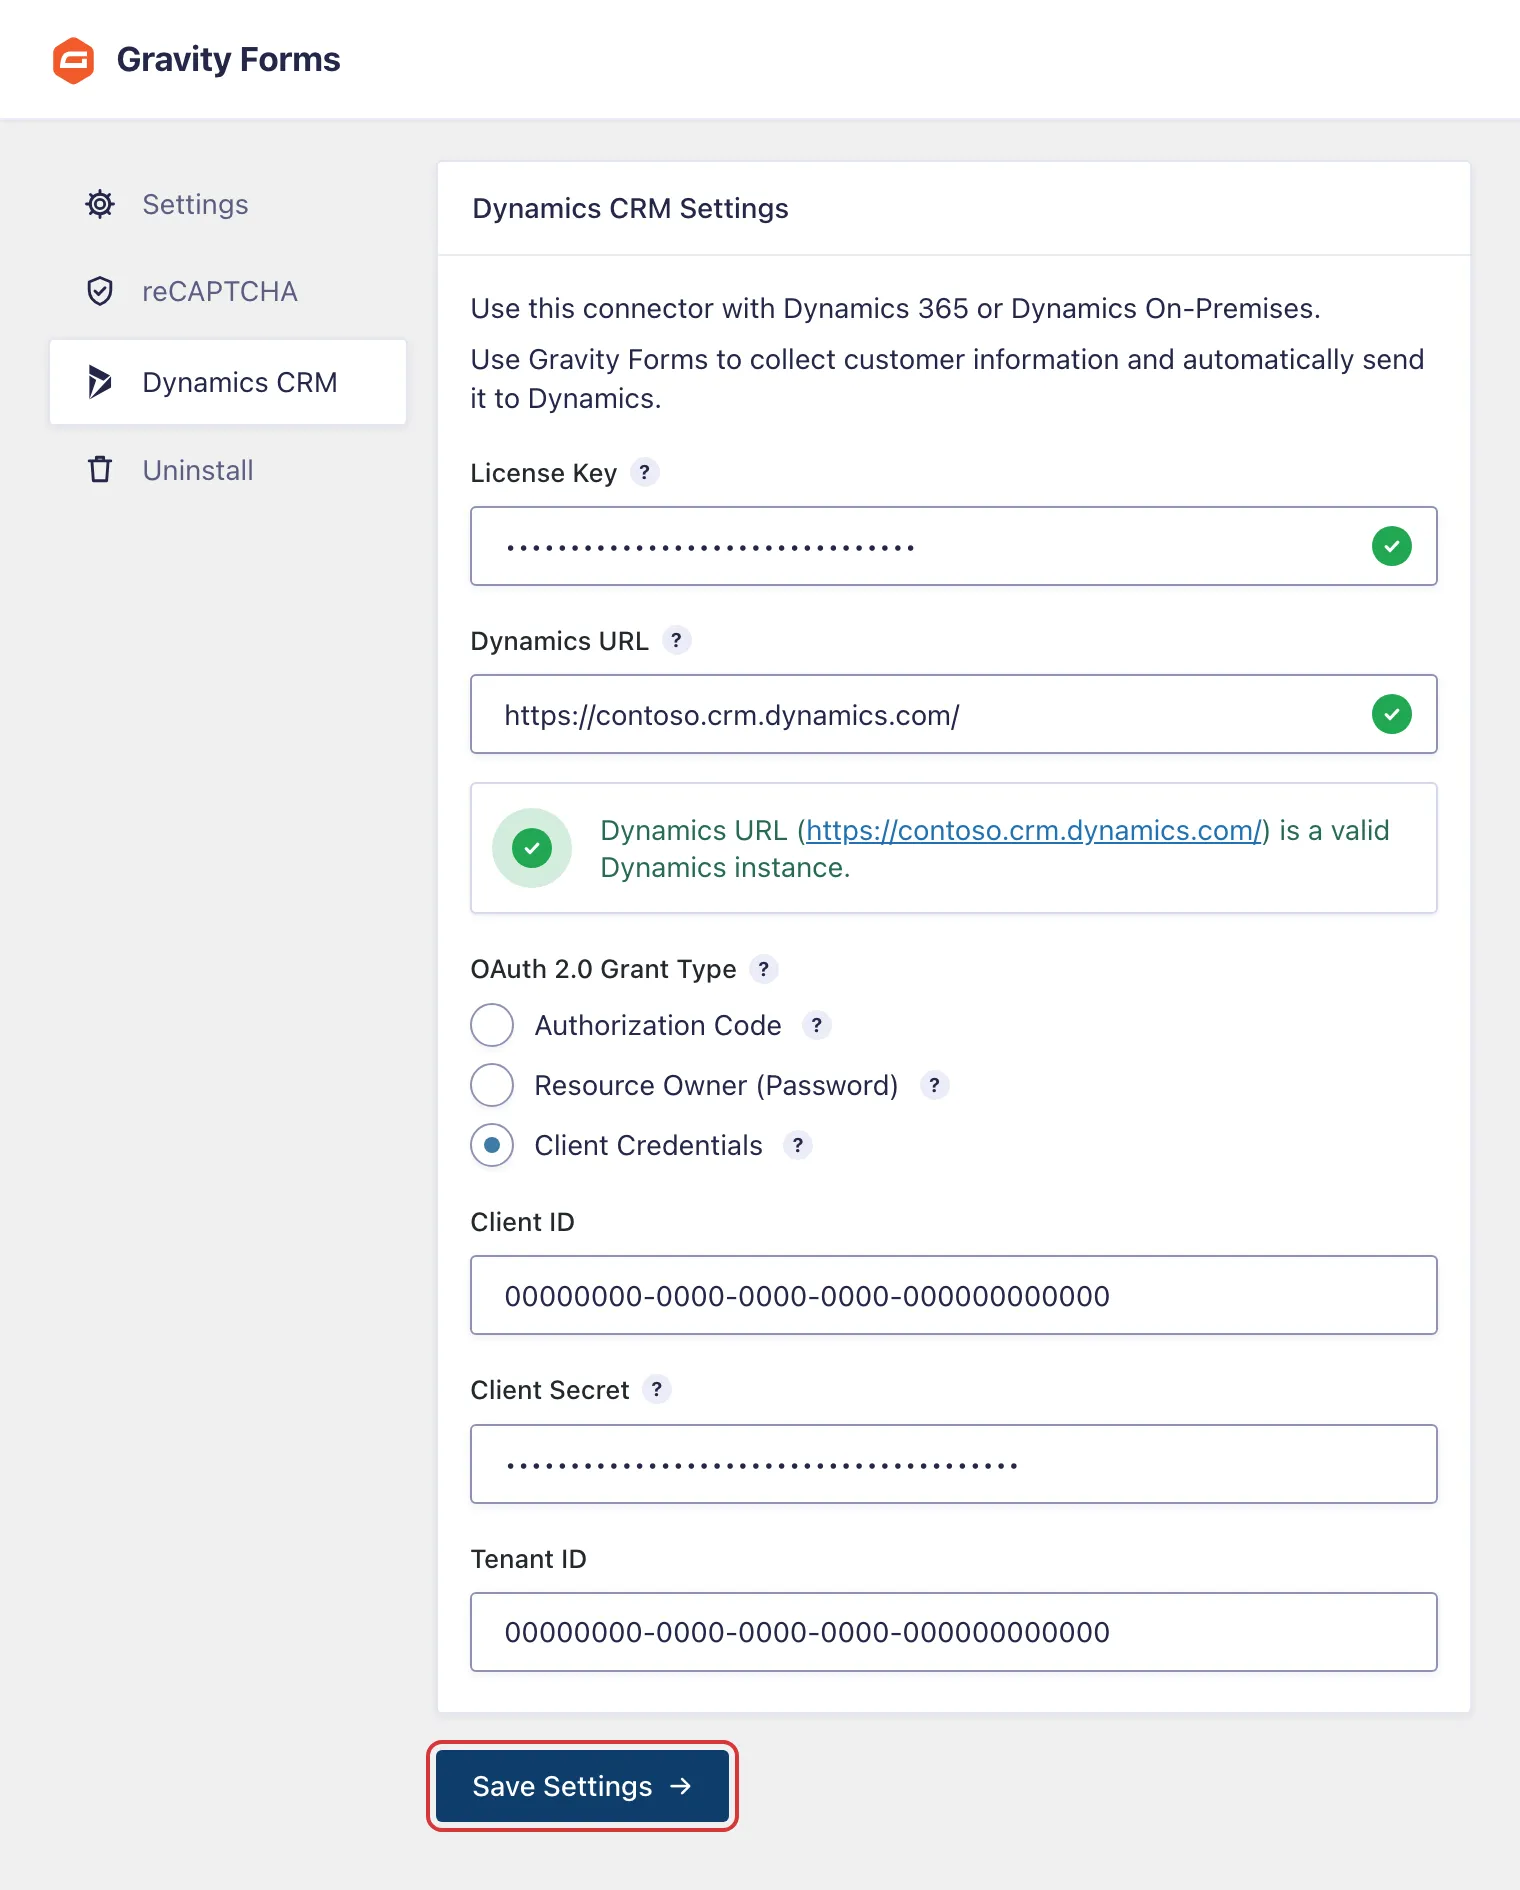
In WordPress, go to Forms > Settings > Dynamics CRM.
-
Under OAuth 2.0 Grant Type, select Client Credentials.
-
Paste the Client ID and Client Secret you saved. The add-on fills in the Tenant ID from your Dynamics URL. If it can’t, enter your directory (tenant) ID from the app’s Overview page.
-
Click Save Settings.
The add-on now connects to Dynamics as the app registration instead of as a named user.