After you have successfully completed installation of the Gravity Forms Dynamics CRM Add-On, you’re ready to begin the initial setup. In this article, we will show you how to perform the initial setup steps required within the Gravity Forms Dynamics CRM Add-On.
Note: This article assumes that you already have an Dynamics CRM Online or On-Premises account. If you do not already have one, you may sign up for an account on the Microsoft Dynamics CRM website.
- If you have not already done so, log into your WordPress admin dashboard.
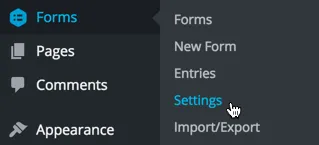
- Once logged in, hover over Forms, then click on Settings on the left side navigation menu.
- From this page, click on the Dynamics CRM tab to access the settings for Dynamics CRM.
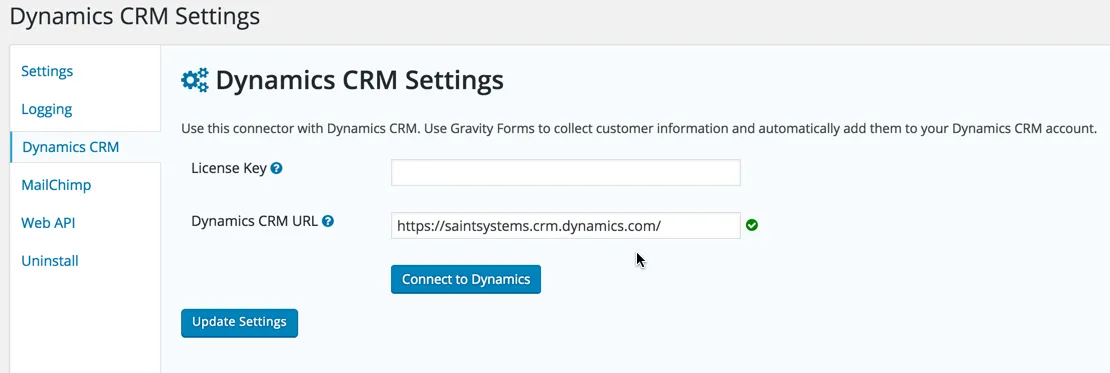
- The first setting you will need to define is the Dynamics CRM URL setting. If you are unsure of your CRM URL, you may obtain this by simply taking a look at your URL when logged into Dynamics CRM.
- Once you have entered your Dynamics CRM URL, simply click the Update Settings button to save your settings.
- If using Dynamics CRM Online, click the Connect to Dynamics button to authorize the app.
- If using Dynamics CRM on-premises, enter your username and password and click the Update Settings button to save your settings.
You should now have completed the initial setup of the Gravity Forms Dynamics CRM Add-On. You’re now ready to continue on to creating a feed.